Corned Beef
Homemade corned beef recipe (with no nitrites)

When I was growing up, one of the food items my dad would like to make was corned beef. One might think, ok no big deal. But I didn’t grow up in New York City or Ireland – this was in Dhaka, Bangladesh. And back then very few people in Bangladesh had heard of corned beef, let alone eaten it or made it at home. Actually, even after all my years living in New York City, I don’t know anyone who makes corned beef at home – we go to diners or Jewish delis to get our corned beef fix.
So it was definitely unusual. And the process was unusual too. My dad would get a large chunk of beef and pierce it all over with a fork; sometimes I would be allowed to help with this bit which was quite fun. After adding some spices, he would immerse the meat in a very salty water bath and there it stayed for days. I remember waiting excitedly for it, inquiring regularly when it would be done. After some days had passed, the meat would finally be taken out and slow cooked for hours. The next day it would be ready for us to eat.
And then we would have corned beef sandwiches for days. They were simple sandwiches comprised of bread with thin sliced meat, but oh so very delicious! Every year we would ask our dad when was he going to make corned beef again. While a lot of food I grew up with was associated with seasons, corned beef sandwiches were not weather specific – they were yummy in the heat, cold, and rain. We used to call it Salted Beef too, the terms were interchangeable in our household. I’ve learned since that while we call it corned beef in the US, apparently in Britain they refer to it as salted beef (well it is salted, so why not call it salted beef). The fact that we used both terms makes sense – my dad loved America (having spent a whole decade here between teenage years and his twenties), and my mom was an anglophile – so of course we ended up using both terms.
Corned beef and the making of it became a treasured annual food ritual, now affixed forever in memories of my happy childhood. I remember taking corned beef sandwiches for “tiffin” to school, I would especially look forward to my tiffin on those days. I had a rectangular metal lunch box that my parents had brought from America; it had raised lettering and graphics – very retro cool when I think back on it. The sandwich wasn’t a giant messy sandwich though, piled with meat, which is kind of how I like to eat corned beef nowadays. The version for tiffin at school was almost like a dainty English tea sandwich, with a few thin slices of salted beef in it (I still enjoy that).

I wonder how my dad had learned to make corned beef. I wish I had thought to ask him but somehow hadn’t, and then he passed away. Now I miss him (and my mom) so very much, but all I can do is hold on to the precious memories. I think that he must have learned it when he lived in New York City for all those years. He loved Katz’s Deli, the jewish deli that exists to this day in NYC, probably the city’s most famous deli; it has a famous scene from the movie When Harry Met Sally and is on the list for many tourists when they visit NY. He would take us there to eat every time he visited New York. We loved hearing him reminisce fondly about when he first started going there in his student days, and how the sandwiches cost like a dollar back then (nowadays a single sandwich costs over $26). He would chat with the counter guys and people who stood in line – my dad was super social, witty, charming, and made friends easily everywhere he went. He would get us corned beef and pastrami sandwiches, and we would eat them along with tomato pickles, which seem to be a specialty of Katz’s.
Did someone at Katz’s tell him how to make it? Did he learn from his best friend in college, who was jewish (years later we met the friend and his family when they lived in Portland, Maine and he was a professor; he and my dad were laughing and joking like no time had passed since their early twenties)… Did he learn from some Irish person – since corned beef is an Irish tradition? I will never know. I can just speculate and think up stories in my head about how my dad might have learned to make corned beef in his youth, which led to us being the lucky recipients of his specialty.
Every year now, for either my dad’s birthday or his death anniversary (sometimes both), my sister and I go to Katz’s Deli in my dad’s memory. His birthday was a few days ago and we continued the tradition. I also decided to make corned beef this year. I had made it a couple of years ago too, but this year I didn’t plan ahead in enough time so it wasn’t ready in time for his birthday. We’ve eaten it since and it was delicious!!!
I am sharing the recipe here. While corned beef is surprisingly easy to make, there are things to be aware of to get the right results.

Tips for cooking corned beef
Plan ahead – corned beef and spontaneity are not friends
- The biggest challenge with corned beef is you have to plan ahead, as it will need to sit in the salt brine for at least 5 days before you can cook it.
- The water bath/brine immersion requires a big pot or container which will take up space in the fridge, so plan for clearing out a section of your fridge for a few days. If you’ve been procrastinating on decluttering your fridge, corned beef can be your Marie Kondo.
- You’ll need to flip the meat once daily while it’s bathing in brine. In case you’re thinking of popping it in the fridge and then going to your other home or on vacation for a week, sorry but that’s not going to work. Unless you want a Jekyll and Hyde corned beef with a super salty cured side and a not-so-cured unsaltyish side.
- You’ll also have to plan for the day you cook. The corned beef will need to cook slowly on low heat for at least 3 hours and up to 6+ hours. During that time while you won’t need to do anything to the beef, you will need to keep a bit of an eye on it.
How long to leave in the brine solution
Corned beef has no corn in it. It’s called corned beef because back in the day, large pellets of salt were used to cover the beef and these pellets were called “corns” in old English. The salt liquid or brine that the beef is immersed in prevents the growth of bacteria and preserves the meat. Generally you can brine for 5 days and up to10 days. (Katz’s Deli apparently brines theirs for 3 to 4 weeks, but they use giant vats with giant pieces of meat, which wouldn’t be applicable to our few pounds of homemade corned beef).
For 4 pounds of beef, I’ve tried brining for 5 days and also 8 days. Since I didn’t do a proper scientific type of experiment, as I varied the cooking duration at the same time (cooked longer after infusing for 8 days), I don’t really know whether the brining duration or the cooking duration made the biggest difference. I think though that the longer brining time of 8 days infused more flavor in the beef.
How long to cook the corned beef
Remember that you’ll need to cook slowly, over low heat. After spending all those days brining, don’t lose your patience at the cooking stage and use short-cuts like high heat, etc. Corned beef is normally made with beef brisket which is naturally tough. To make it tender, you’ll need to cook at a low temperature for a long time, otherwise you’ll end up with tough and chewy meat which is not what you want.
The size of meat will make a difference to the amount of time you’ll need to cook for. General rule of thumb is one hour per pound of meat. For 3.5 to 4 pounds of beef, cook on low heat for at least 3.5 hours.
If you’re cooking on a stove top, like I did, you should reach the target internal temperature for the beef after about an hour (my target was 190F; see temperature section below for more on target temperature). Cook for at least 2 more hours after it reaches the target temperature. At 3.5 hours, you’ll get corned beef that’s tender but dense, where the pieces will be firm and not fall apart when you slice. If you want small sandwiches with thin slices of meat that are easy to eat (think elegant and not messy), then you could stop cooking at this point.
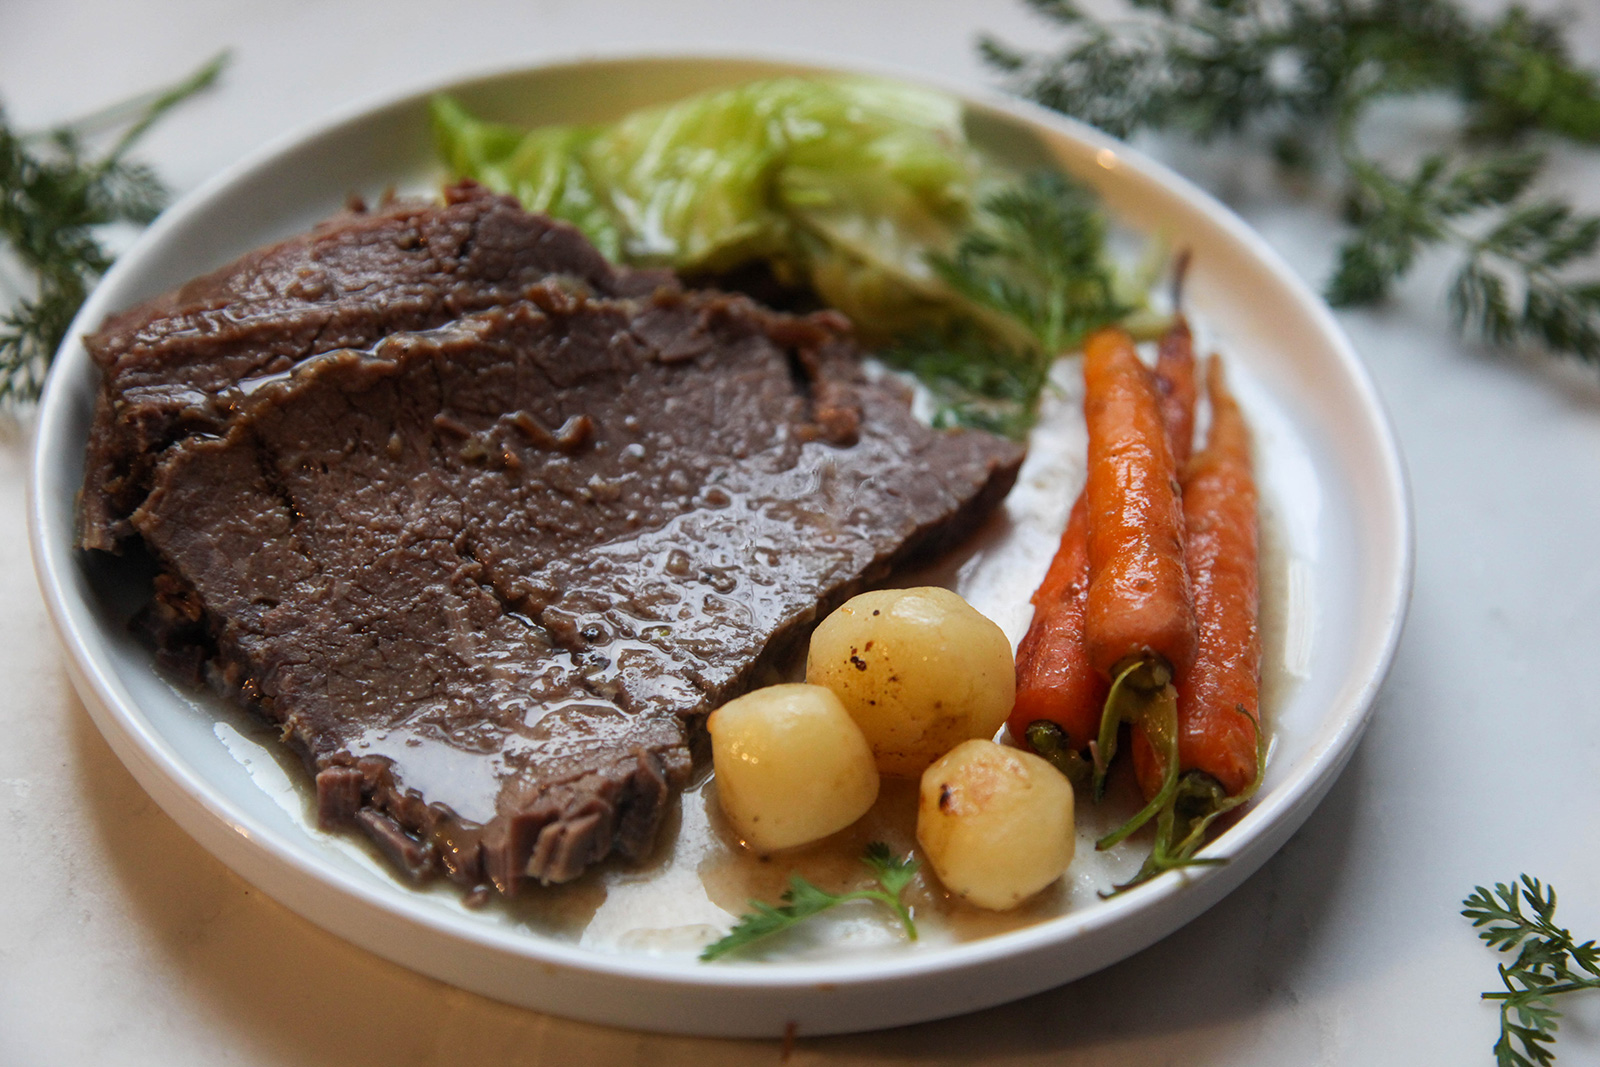
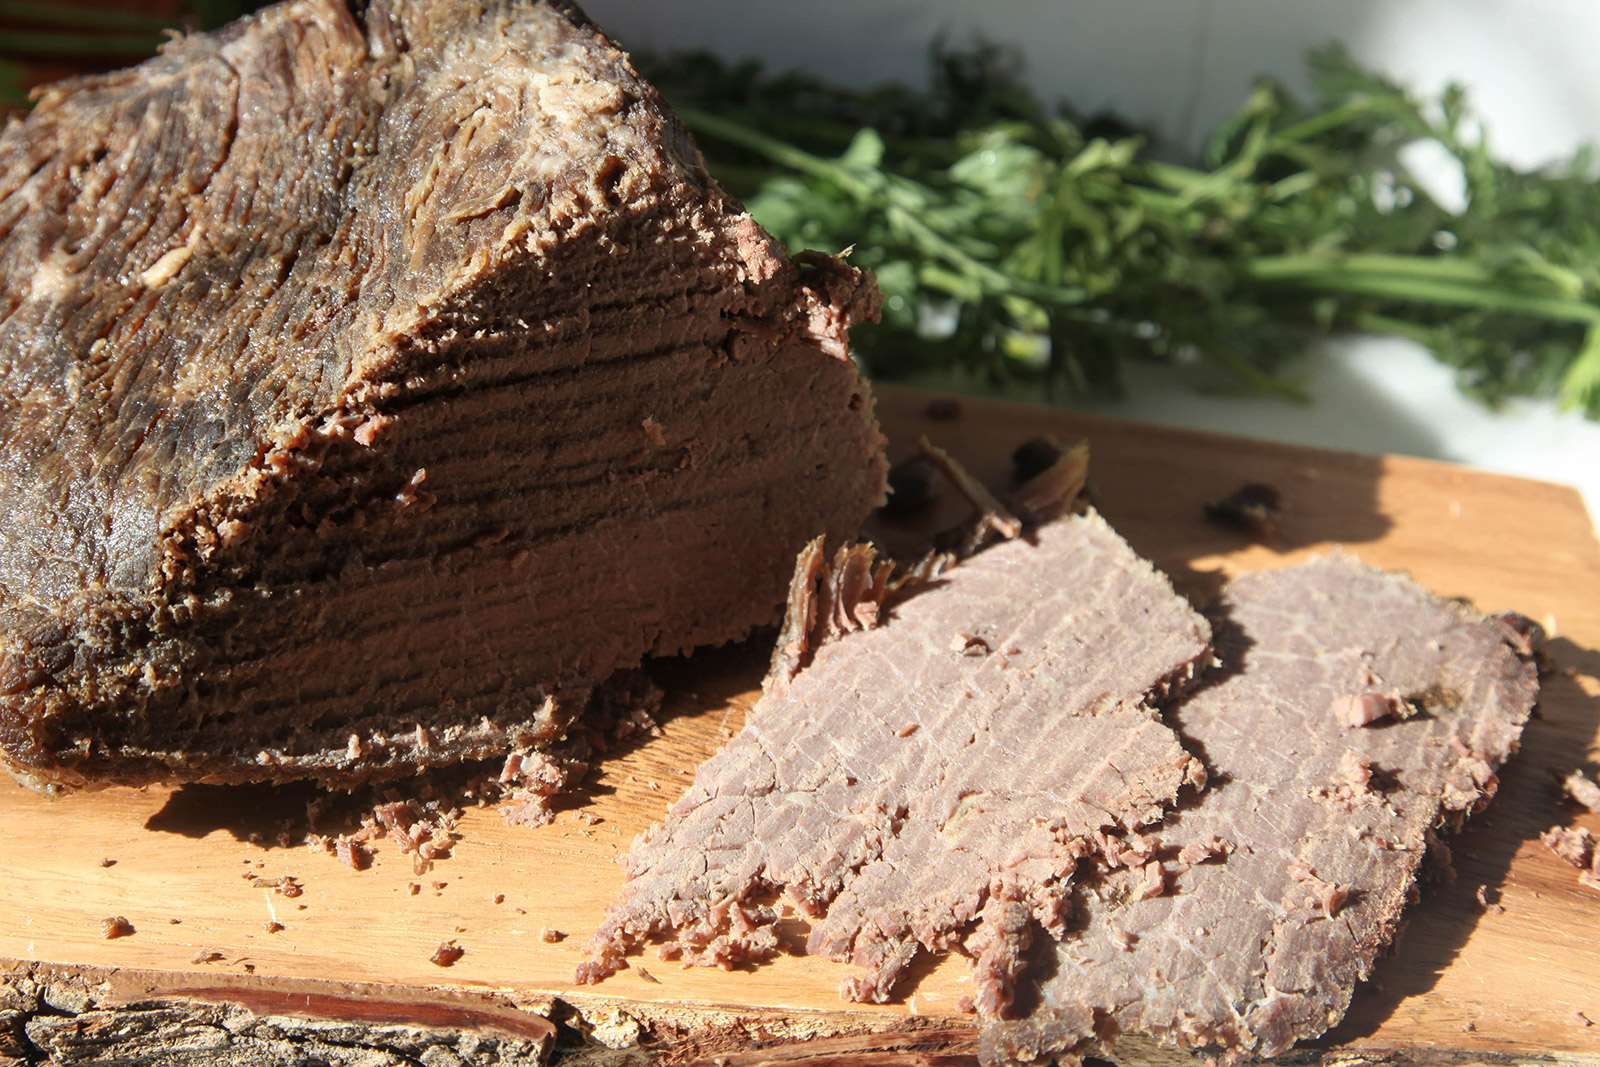
However, if you want corned beef that’s a super tender, juicy, melt-in-your mouth experience, then cook for longer than 2 hours after you reach the target internal temperature. The longer you cook, the more the connective tissue in the meat will break down. For 4 pounds of beef, I cooked for 6.5 hours to get the texture you see in the photos. The meat tends to fall apart at this point when you slice (the corned beef at Katz’s also falls apart). I think if I cooked beyond this point, the meat would end up being like shredded beef.
What temperature to cook the corned beef
If you’re cooking on a stove top, like I did on a gas flame, it may be difficult to get less than 190-200F at the low setting. Using the smallest burner, at the lowest setting possible, the ambient temperature of the liquid surrounding my corned beef fluctuated between 190F-200Fish. My target for the internal temperature of the meat was 190F. I wanted the meat to be tender and not chewy, so I didn’t want it to get higher than this. At the same time, I didn’t want to cook for 9+ hours on an even lower setting (which wouldn’t really be possible on my stovetop).
Once the meat reached the internal temperature of 190F, in order to maintain that temperature I had to leave the lid of the pot open a little crack (leaving it open too wide will cause the temperature to drop too low, and closing it completely will raise it too much over time).
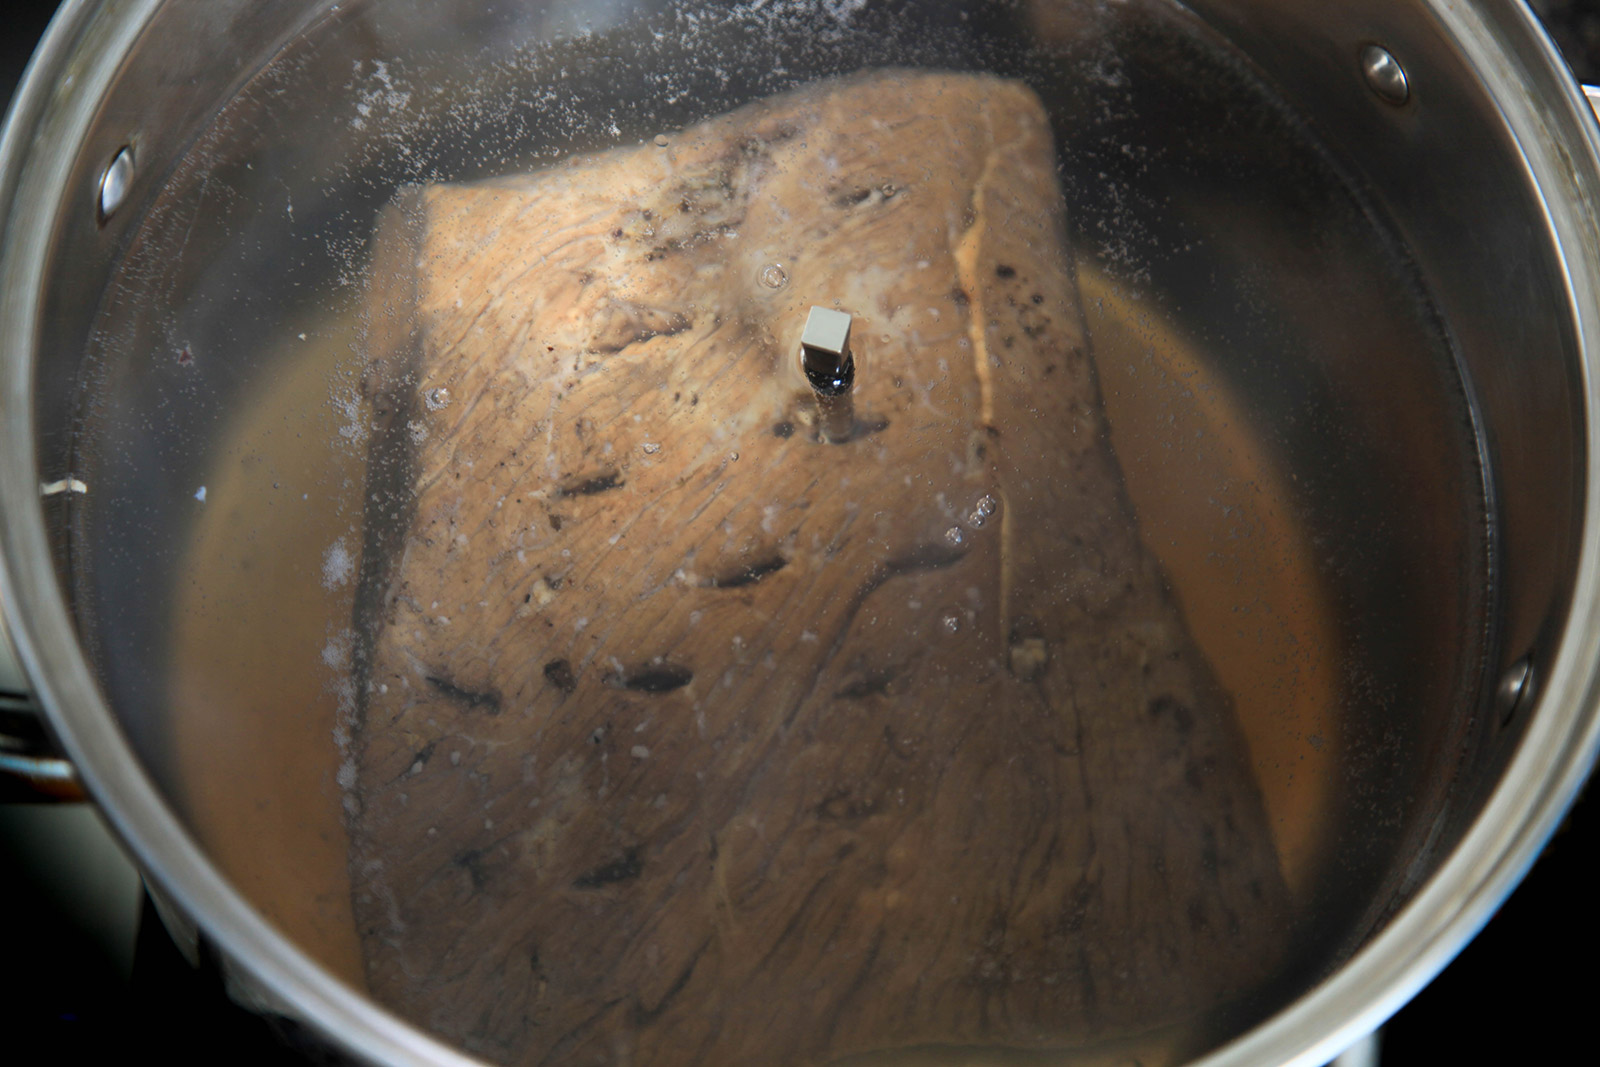
I used a smart Meater thermometer, which connects to my iPhone and gives a temperature reading inside the meat as well as ambient temperature of the liquid surrounding the meat. As a result, I was able to gauge and maintain the temperature quite accurately (and it was pretty cool using Meater, thanks to my hubby for the gift).
You don’t need a thermometer though for cooking corned beef (my dad never used a thermometer, and I didn’t either when I made corned beef in the past). Remember to cook over very low heat throughout. Keep the pot completely closed with the lid for the first hour, at which point the meat will reach 190F-200F. Then crack open the lid a tiny bit and cook for at least 2 more hours or to however much tenderness you’d like.
Use sodium nitrite (pink salt) or not?
Commercially produced corned beef, and those at delis, have a nice pink color. This color comes from using sodium nitrite, which also helps preserve the meat. Sodium nitrite is known to be a carcinogen; the NIH says “ingested nitrite from processed meat can lead to colorectal cancer in humans”. We hear nowadays that it’s bad to eat processed meat and that it can cause cancer – and the reason is most processed meat uses sodium nitrite.
I don’t think we should be ingesting toxic chemicals and risk cancer, just to get a pink color in the meat. Not worth it. My homemade corned beef recipe is free of sodium nitrite. The color is thus brownish, which is what happens to beef when you cook it. I am totally fine with that. Nothing wrong with brown. And the corned beef turns out delicious – it’s the taste that counts!




Homemade Corned Beef (with no nitrites)
MAKES: 8-10 thick sandwiches
INGREDIENTS
4 lb beef round (top or bottom), or brisket
Spices for the brine bath
- 2 cups kosher salt
- 6 garlic cloves: 4 smashed, 3 sliced
- 1.5 tablespoon whole peppercorns
- 4 bayleaves
- 1 tablespoon whole cloves, plus 6 extra whole cloves
- 1 two-inch piece cinnamon stick
- 1/2 tablespoon ground ginger
- 1/4 cup sugar
- 1/2 tablespoon ground mace (optional)
- 1/2 tablespoon ground allspice (optional)
- 1 beet, peeled and cut into pieces (optional)
- 16 cups water
Spices for cooking
- 1 tablespoon whole peppercorns
- 2 bayleaves
- 1 inch piece cinnamon stick
- 1/2 tablespoon ground ginger
METHOD
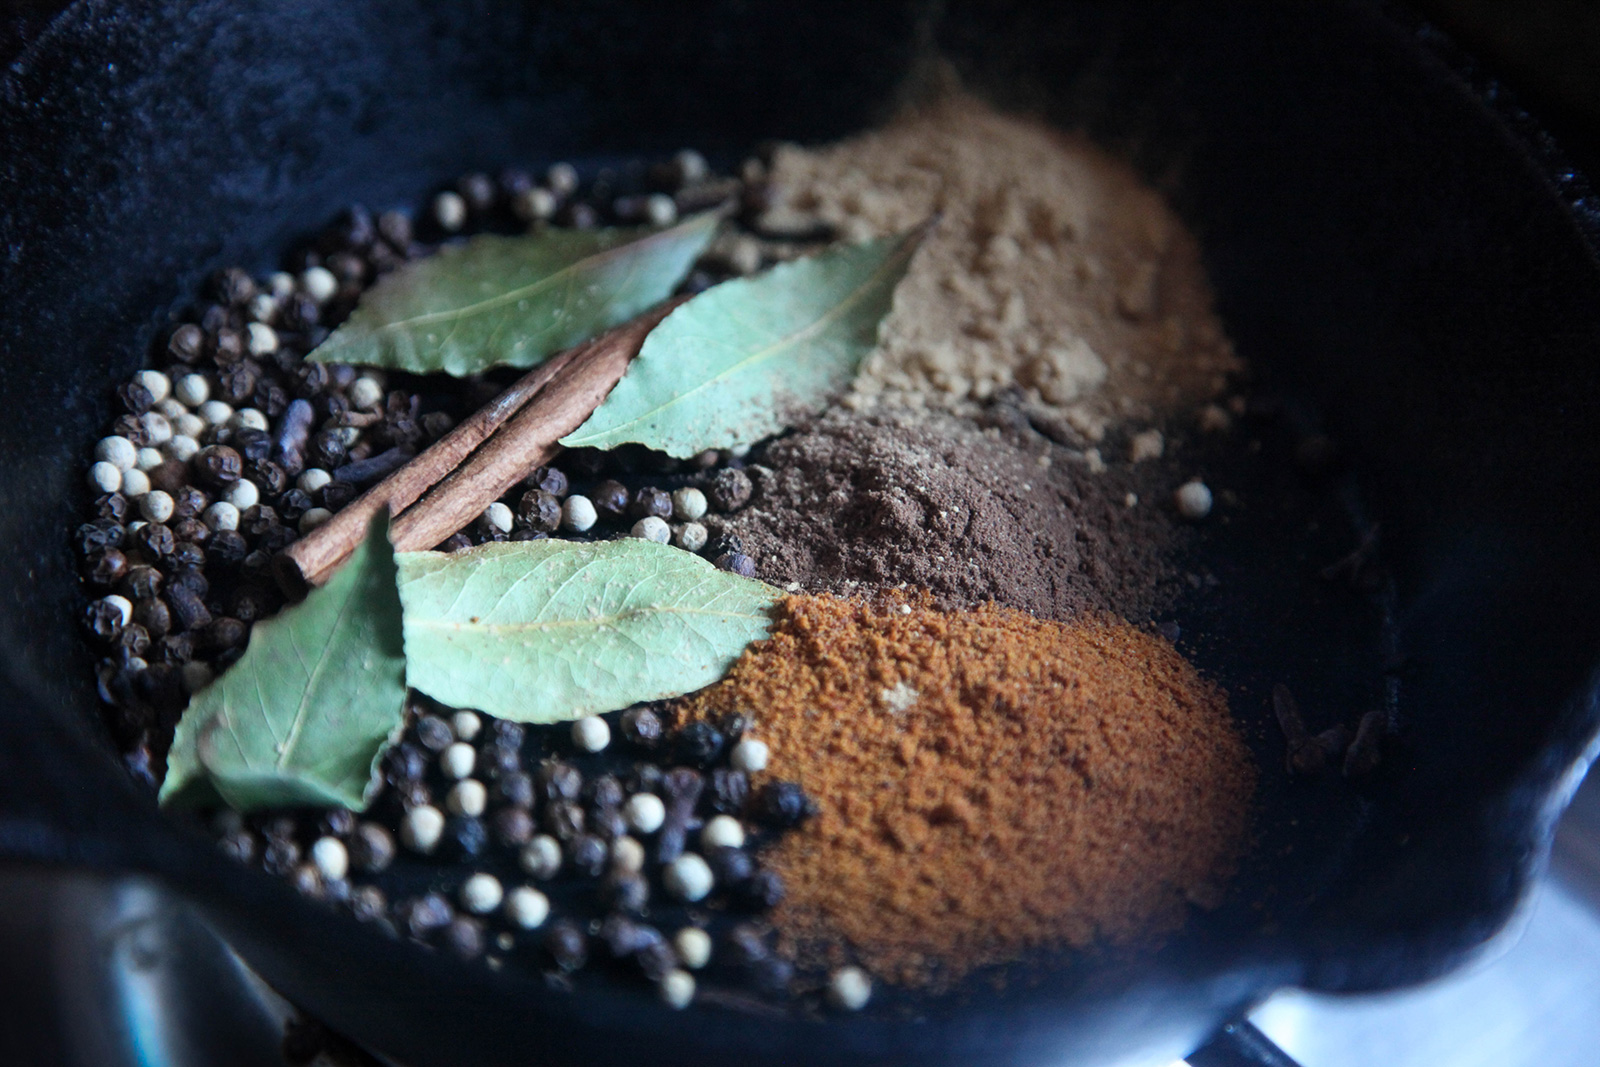
- Dry toast whole spices plus bayleaves in a skillet for 1-2 minutes over medium low heat until fragrant. Stir to prevent burning. Add the powdered spices toward the end and toast for 15 seconds.
- Remove from heat, pound into a coarse powder in a mortar and pestle.
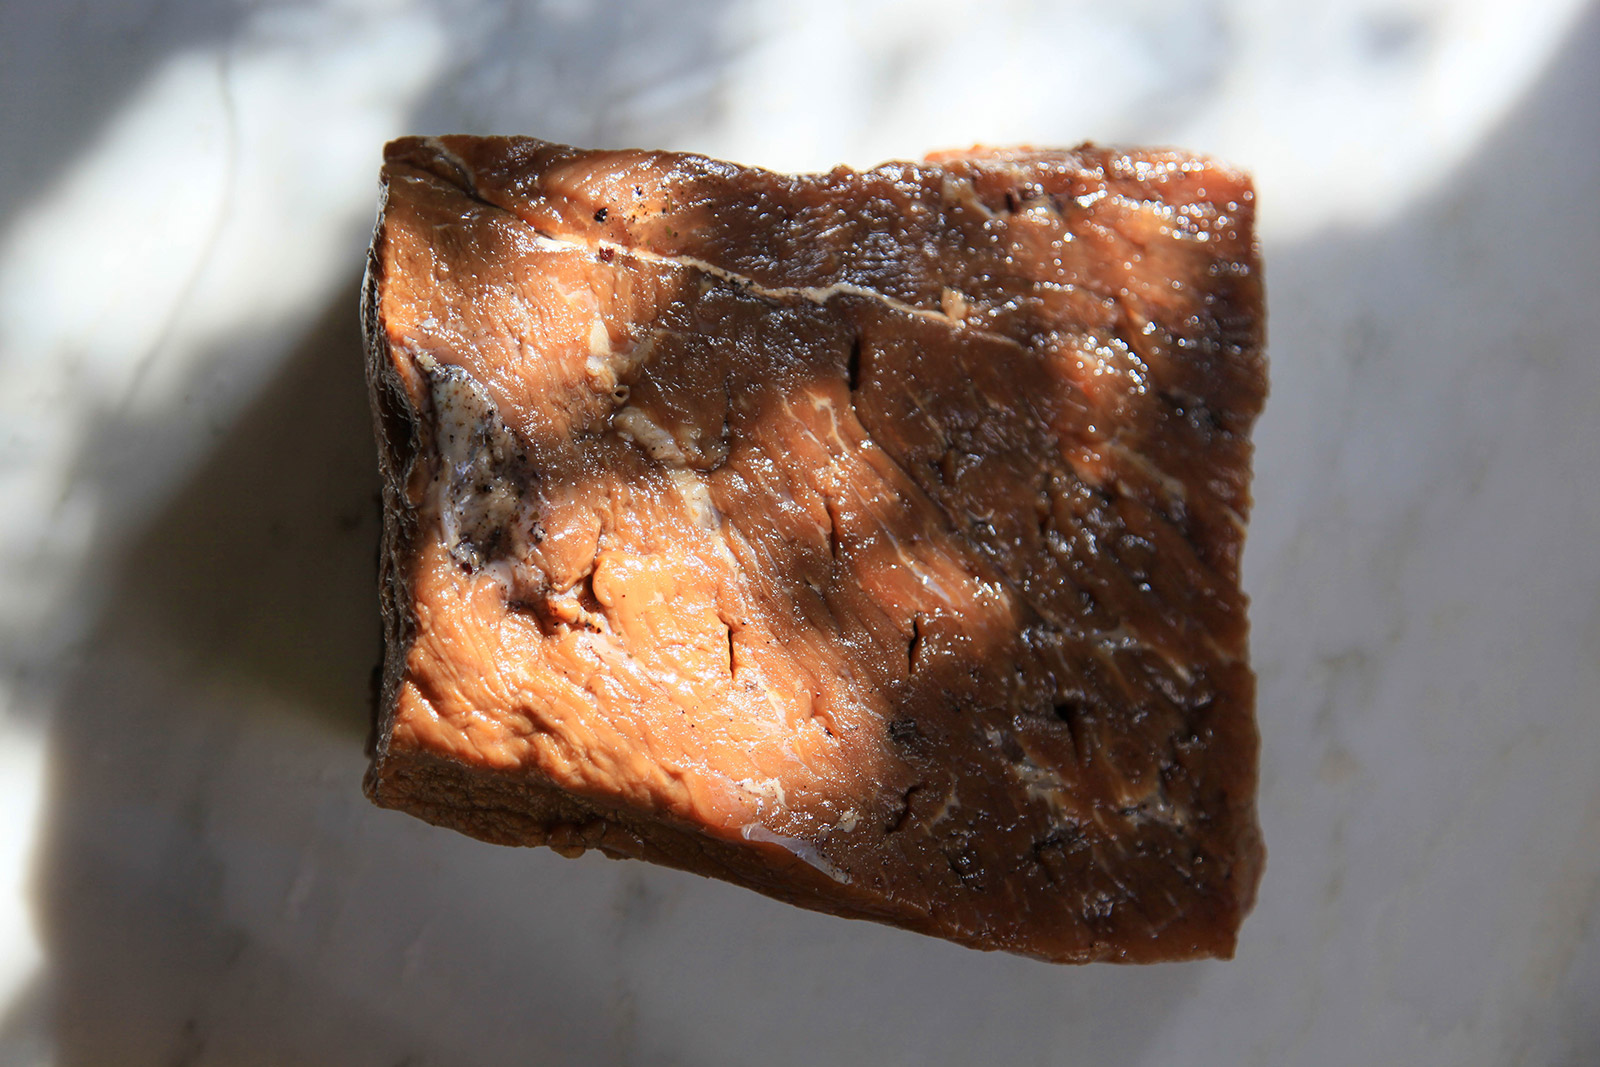
- Prepare the beef by piercing it all over with a fork.
- Cut a few small slits in the beef (on all slides so it’ll be even), and insert slices from the 3 cloves of garlic. Also insert the 6 whole cloves around the beef.
- In a pot that’s large enough to hold the meat and water, combine water, salt, sugar, smashed garlic, powdered spices, and the beet if you’re using it (I use it for natural sweetness). Bring to a simmer, stirring until the salt and sugar dissolve. Remove pot from the heat, let the brine cool to room temperature, and then refrigerate until the brine is completely chilled.
- Place the beef in the chilled brine and weigh it down it with a plate to ensure it stays submerged. Refrigerate for 5 to 8 days, flipping the meat daily (see tips section above).
- After 5 (to 8) days, prepare to cook. Remove the meat from the brine. Rinse the meat under cold water. It’s ok if the spices fall off.
- Discard brine from the pot (it’ll be incredibly salty so you can’t save it or use it for anything else). Wash pot, put meat back in, and fill with water. Water should be a few inches above the meat. If you’re using a thermometer, follow the directions for your thermometer if inserting into the meat while it cooks.
- Toast and grind the spices for cooking, following the same method as steps 1 and 2. Add the ground spices to the water in the pot, stir, put pot on stovetop on the smallest burner. Turn on the heat at the lowest possible setting and cover the pot.
- If you’re using a thermometer, let the water temperature reach 190F. This will take about an hour. Make sure it doesn’t rise above 200F – after an hour, you can maintain the temperature by cracking open the lid of the pot a little.
- The internal temperature of the meat will keep rising if the lid stays closed. The goal is to cook the meat at 190F (don’t let it rise beyond 200F) – cracking open the pot lid a little bit after an hour will help maintain the internal temperature when the meat reaches it.
- Continue cooking for desired tenderness of meat. See my tips section above. If you want tender but firm slices, 3.5 to 4 hours will be fine. If you want soft, melt-in-your-mouth pieces that will fall apart, cook for about 6 hours. Beyond 6.5 hours, the meat will disintegrate too much and become shredded, so make sure not to overcook it.After 4 hours, I lift the meat up with a large heavy cooking spoon and press into it with the side of a spoon – if the meat feels firm I put it back. If you’re not using a thermometer, then once the meet starts feeling soft, stick a fork in the thickest part of the meat. If it slides in with no resistance, the meat should be done.
- When the corned beef is tender enough, remove pot from the heat. Let the meat rest for an hour in the liquid and then you can eat. Or you can put the pot back in the fridge for one more night, letting the meat sit in the broth, and eat the beef the next day.
- Don’t discard the broth (you can save some broth in a separate container in the fridge). The beef will dry out when stored without broth, so if you want it moist when eating lightly warm up broth on low heat and spoon it over the meat when you’ve sliced it. The corned beef will be delicious!
- Slicing: slice the beef against the grain. Look at the lines on the meat and slice perpendicular to the lines. (See step 15 image where I sliced along the grain, and compare with the header image at the top of this post where I sliced against the grain). Slicing against the grain will give you the melt-in-your mouth effect. Enjoy!


I was lucky enough to have some of this corned beef dropped off at my place by the chef herself. It was really delicious. Even eaten as a plain sandwich with just rye bread (no other condiments) was so tasty. Reminded me of my dad’s corned beef which we all used to love.
Thanks SC. This is a precious compliment!
looks very delicious, will definitely try making it
Thanks Mohira! Hope you do 🙂